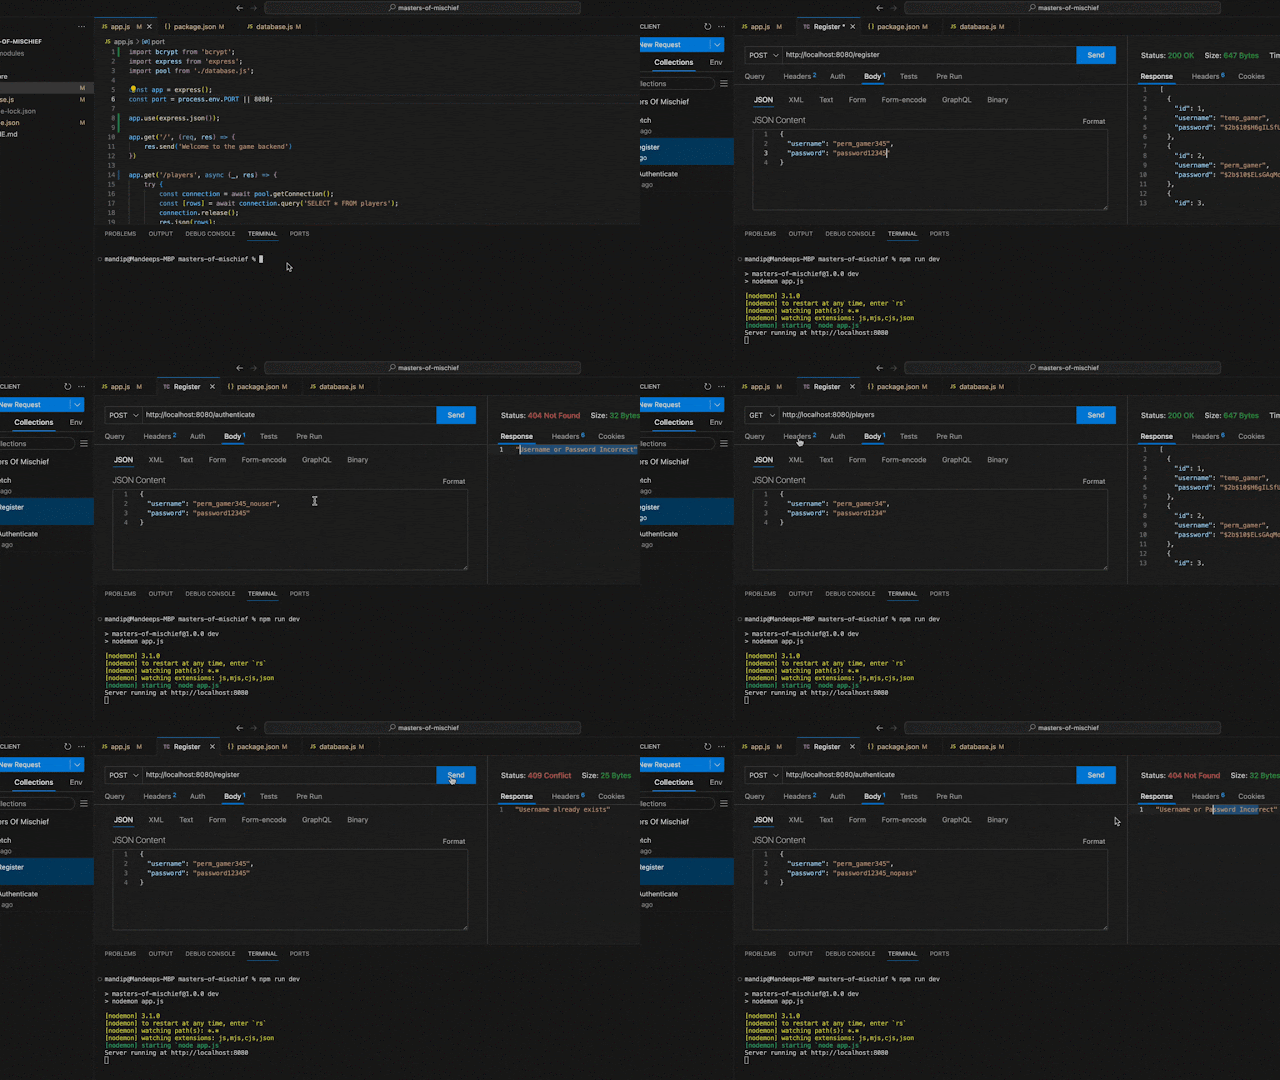
This is a part 2 of our development blog series on "Masters of Mischief" which is our 3D Multiplayer game. In this post, we'll discuss the process and see a few code blocks about implementing an authentication system in the server.
 |
| Fig 1. Thunder Client snapshot | API testing |
With our requirements set, let's move the card in our Trello board and go through the journey of making the work in progress.
 |
| Trello Card |
🟢 app.js
🟨 Javascript
🟦 Node.js
import bcrypt from 'bcrypt';
import express from 'express';
import pool from './database.js';

const app = express();
const port = process.env.PORT || 8080;
Registration route:
Our /register endpoint will:
➣ Be a POST endpoint.
➣ Receive username and password in request body.
➣ Check if the username already exists in the system.
➣ Hash the plain password and register non-existing user into the database.
The codeblock below shows the code for registration endpoint.
🟢 Registration
🟨 Javascript
🟦 Express
                    app.post('/register', async(req, res) = >{
  try {
    const {
      username,
      password
    } = req.body;
    const connection = await pool.getConnection();
    const[rows] = await connection.query('SELECT * FROM players WHERE username = ?', [username]);
    if (rows.length == 0) {
      const hashedPassword = await bcrypt.hash(password, 10);
      const[rows] = await connection.query('INSERT INTO players(username, password) VALUES (?, ?);', [username, hashedPassword]);
      if (rows != null) {
        res.json("New user registered!");
      }
    } else {
      res.status(409).json("Username already exists")
    }
    connection.release();
  } catch(error) {
    console.error('Error executing query:', error);
    res.status(500).json({
      error: 'Database error'
    });
  }
})
Login/Authentication route:
Our /authenticate endpoint will:
➣ Be a POST endpoint.
➣ Receive username and password in request body.
➣ Check if the username exists in the system.
➣ Compare the input password with the password of the existing username.
➣ Respond with the authenticated user data.
🟢 Auhentication
🟨 Javascript
🟦 Express
                    app.post('/authenticate', async(req, res) = >{
  try {
    const {
      username,
      password
    } = req.body;
    const connection = await pool.getConnection();
    const[rows] = await connection.query('SELECT * FROM players WHERE username = ?', [username]);
    if (rows.length > 0) {
      const isPasswordCorrect = await bcrypt.compare(password, rows[0].password);
      if (isPasswordCorrect) {
        res.status(200).json(rows[0]);
      } else {
        res.status(404).json("Username or Password Incorrect")
      }
    } else {
      res.status(404).json("Username or Password Incorrect")
    }
    connection.release();
  } catch(error) {
    console.error('Error executing query:', error);
    res.status(500).json({
      error: 'Database error'
    });
  }
})
Later from Unity3D, we call this endpoint to authenticate a user, and upon successful authentication, we can use the response user data to manage session.
We have used Thunder Client to test the API endpoints locally for a local server, and here is a playback of the testing.
 |
| Fig 2. API Testing using Thunder Client |
Comments
Post a Comment